 AGreenNest
DIY Plant Projects
Build a Mini Windowsill Greenhouse for Seeds
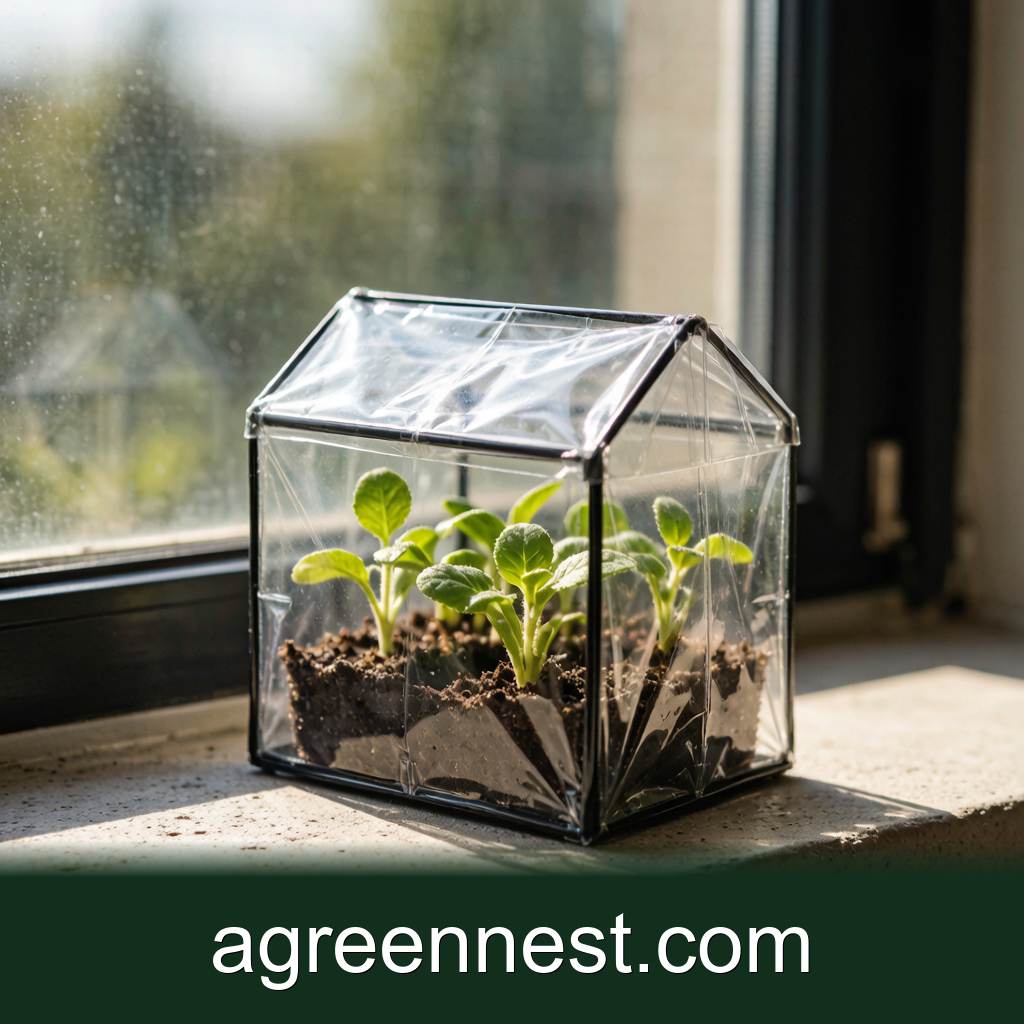
Cold drafts and dry indoor air knock back the tender cuttings I try to keep through winter, so I built a small greenhouse that sits on the sill and costs almost nothing. A clear plastic box traps the moisture the plants lose and keeps the temperature steady a few degrees above the room. In my experience, this low box outperforms a fancy dome for anything small.
Why a Windowsill Greenhouse Pays Off
Seedlings and fresh cuttings rot or dry out when the air swings from one extreme to the other. A sealed clear box holds humidity near 70-80 percent and shields fragile growth from the cold glass. You also get a head start on spring sowing without a heated room. A box this size fits on a kitchen sill or a bedroom shelf, so you can keep an eye on it through the slow months. If you already run a propagation station, this box becomes its winter companion.
Materials and Tools
- One clear acrylic or plastic storage box, about 30cm long, 20cm wide, and 15cm tall
- A lid that fits, clear if possible
- A 5V USB fan, 40mm, or a small wedge to prop the lid
- A seedling heat mat, 25x15cm, with a thermostat if you have one
- A humidity tray: a 20x12cm shallow dish, pebbles, and water
- Seed trays or 7cm pots, plus plant labels and a pencil
- A drill or hot pin for vent holes (only if your lid seals tight)
Assembling the Box, Step by Step
- Wash the box and lid in warm water and let them dry. Dust on the plastic scatters light.
- Place the heat mat under the box, not inside it. Set the thermostat to 21-24°C for warm growers.
- Put the humidity tray inside the box and fill it halfway with pebbles. Pour in water to just below the pebble tops, about 150ml, so the surface evaporates without soaking pots.
- Set your seed trays or pots on the pebbles, keeping their bases above the water line.
- If the lid seals fully, drill or melt four 6mm vent holes along opposite top edges. If the lid lifts free, leave it and prop one corner 1-2cm with the wedge.
- Mount the USB fan near a vent hole on a low setting, or aim it to brush the lid gap. Moving air stops mold on damp soil.
- Label every tray with species and date using the pencil. I forget which tray is which within a week without labels.
When the windowsill light drops below what seedlings need, I switch on a full-spectrum grow light on a 12-hour timer. The box concentrates the light, so a modest panel does the job.
Light, Heat, and Humidity
An east window gives bright morning sun and shade from the harsh afternoon, which suits most seedlings. A south window works if you lift the lid a touch to vent heat. Aim for 14-16 hours of light in late winter for strong stems. Keep the heat mat on only at night or for warmth-loving types, since constant bottom heat bakes small roots.
Top up the humidity tray every 2-3 days with 100-150ml of water. Wipe condensation off the lid each morning so light reaches the leaves. A cheap thermometer inside the box tells you more than a guess, since soil stays workable between 18°C and 26°C and stalls below 15°C. If you are propagating succulents from leaves, leave the lid off or crack it wide, because those pups hate still, wet air.
Using It for Seeds and Cuttings
Sow fine seed on the surface of damp grit and close the lid for the first 7-10 days until sprouts show. For stem cuttings, sink the cut end 2-3cm into moist mix and keep the box shut for the first week, then open it for a few hours daily. The same enclosed space helps you overwinter succulents that would otherwise shrivel by the heater. I also tuck in a kokedama moss ball now and then to keep its wrapper damp.
Daily and Weekly Checks
Open the lid for 30 minutes each day once plants are established, and check the tray water every other day. Every weekend, wipe the inside walls and look under leaves for fungus gnats. Trim any seedling that touches the lid so it does not scorch. After 4-6 weeks, harden plants by leaving the lid off for longer stretches before they move out.
Frequently Asked Questions
Q: Do I need the USB fan if I prop the lid?
A:
Not strictly. Still air invites gray mold on wet soil. A fan or a daily lid lift breaks the stale pocket.
Q: What temperature should the heat mat hold?
A:
Around 21-24°C suits most seeds. Cool growers such as pansies prefer 15-18°C, so use the thermostat or skip the mat.
Q: Can I use a picture frame instead of a box?
A:
Yes. Lay the frame over pots on a tray and block two edges with a book. You lose some humidity but gain easy access.
Q: How often should I water inside the box?
A:
The humidity tray does most of the work. Water pots only when the top 1cm of mix feels dry, usually every 5-7 days.
Q: Will the grow light overheat the enclosure?
A:
LED panels stay cool. Keep any light 15-20cm above the lid and vent the box if it feels warm to the touch.
Q: When do I move plants out of the box?
A:
After 4-6 weeks, once they have true leaves and you have left the lid off for a full day without wilt.
A windowsill greenhouse turns one cold shelf into a steady nursery for seeds and cuttings. Build it once, label everything, and let the trapped humidity do the heavy lifting. For more on keeping light levels right, see our grow light guide.
Recommended Tools for DIY Plant Projects Care
Free, no-signup helpers matched to this guide.
Free Ebooks to Explore
Downloadable handbooks — no email required.
Free Ebook
The AGreenNest Succulent Care Handbook
The complete, beginner-to-confident guide to growing fat, happy succulents — 10 chapters and a 20-plant directory.
Free Ebook
Haworthia & Haworthiopsis Care Handbook
A focused guide to the striped, forgiving Haworthia clan.
Join the Conversation
Have a tip or a question about Build a Mini Windowsill Greenhouse for Seeds? Share it below — comments are saved on our server.