 AGreenNest
DIY Plant Projects
Make a Pebble Humidity Tray in 10 Minutes
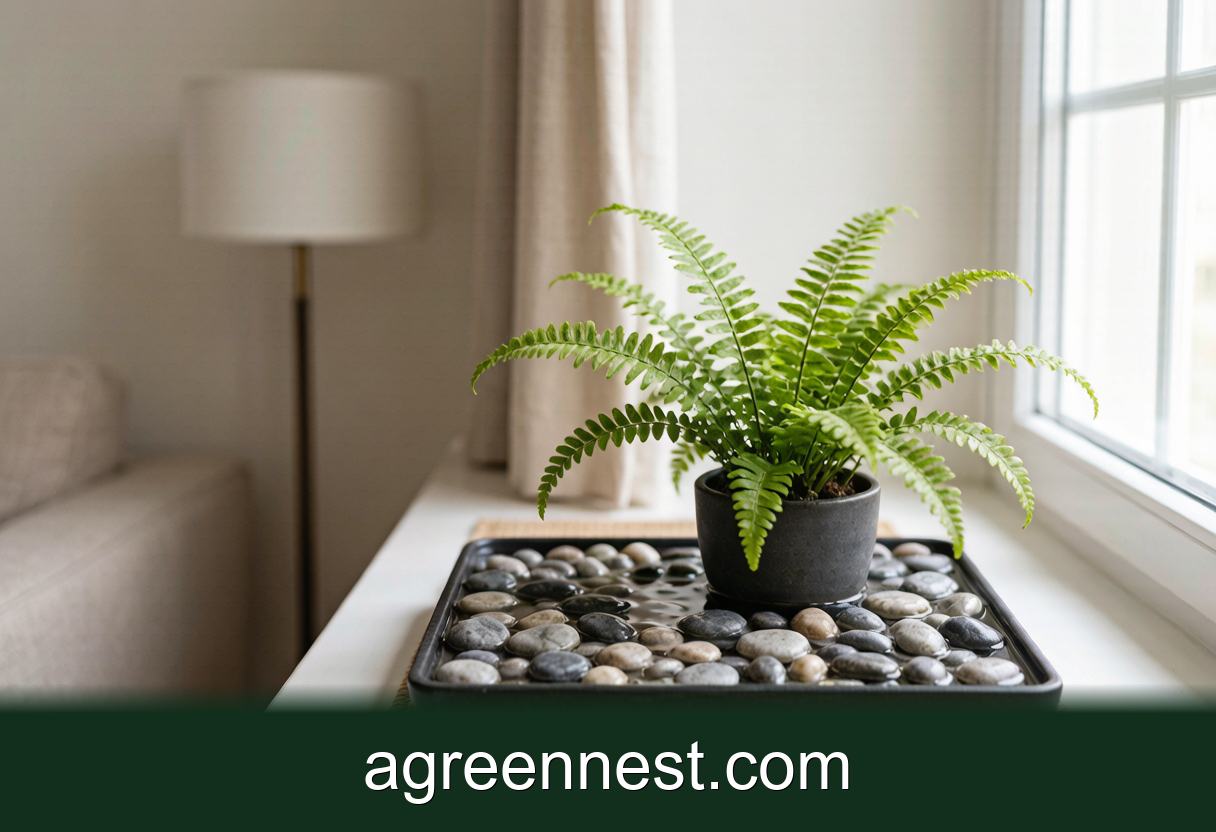
A pebble humidity tray is a shallow saucer filled with pebbles and water that sits under a plant to raise local humidity as the water evaporates. Keep the water level just below the pebble tops so the roots never sit in it. It lifts humidity around the leaves by roughly 5 to 10 percent.
Here is a build that costs about the price of a coffee and takes ten minutes. No pump, no electricity, no maintenance beyond a top up twice a week. A pebble humidity tray is the quiet workhorse of dry-air plant care, and it is the first thing I set up before I ever consider a humidifier for a single fussy fern.
Let me be straight about what it does and does not do, then give you the exact setup so it actually works instead of just sitting there wet and useless.
What a Pebble Tray Actually Does (and Doesn't)
The idea is simple physics. Water in the tray evaporates, and as it rises past the leaves it lifts the humidity in the small pocket of air right around the plant. That is it. You are creating a slightly moister microclimate 10 to 20cm wide, not changing the room.
That matters because dry indoor air, often 20 to 35 percent relative humidity in a heated winter flat, is what browns the leaf tips on humidity lovers. A tray nudges the air near the leaves up by roughly 5 to 10 percent. Modest, but for a plant sitting in that pocket all day, modest and constant beats a five minute misting that dries off in twenty. For a full breakdown of tray versus spray versus machine, see mister vs humidifier.
What it will not do is humidify a whole room or rescue a plant that needs 60 percent when your air is 25. For that you need a real appliance. The tray is a targeted fix for one plant or a small cluster.
What You Need
Keep it cheap and it works just as well as anything fancy.
- A shallow, waterproof tray 3 to 5cm deep and at least 5cm wider than your pot base. A plant saucer, a baking dish, or a cheap terracotta drip tray all work.
- Pebbles, gravel, or clay pebbles about 1 to 2cm across, enough to fill the tray one layer deep. Aquarium gravel or LECA both work. Roughly 1 to 1.5kg for a 25cm tray.
- Water. Tap is fine; if your water is very hard, rainwater or filtered water leaves less white mineral crust.
- Optional: a splash of 3% hydrogen peroxide every few weeks to keep the water clear.
That is the whole list. If you already keep terracotta pots around, one of their saucers is the perfect tray.
How to Build It, Step by Step
- Rinse the pebbles under the tap to wash off dust, especially with clay pebbles which shed a lot of red powder at first.
- Fill the tray with a single even layer of pebbles, 2 to 3cm deep. You want enough that the pot sits on stones, not on the tray floor.
- Add water until it reaches about two thirds up the pebble layer. The critical rule: the water line must stay below the tops of the pebbles.
- Set the plant pot on top. The base of the pot rests on dry pebble tops, above the water. Check that no drainage hole is touching the waterline.
- Top up every 3 to 5 days as it evaporates, or whenever the water drops near the tray floor. In peak summer or over a radiator you may refill more often.
The one mistake that ruins the whole thing is letting the water rise above the pebbles so the pot sits in it. That wicks moisture straight into the soil, keeps the roots soggy, and gives you root rot instead of happier leaves. Water below the pebble line, pot resting on dry stone, every time.
Which Plants Benefit Most?
The plants that evolved in humid understory or rainforest air are the ones that notice. From my own shelf, the clear winners are:
- Ferns. A Boston fern (Nephrolepis exaltata) and especially a maidenhair (Adiantum raddianum) crisp at the edges below 40 percent humidity.
- Calatheas and prayer plants (Maranta leuconeura). Notorious edge-browners that respond well to steadier moist air.
- Air plants, orchids, and nerve plants (Fittonia), which all like a moist microclimate.
Group two or three on one big tray and their combined transpiration plus the evaporating water builds a noticeably moister pocket. Pairing the tray with the right bathroom humidity plants or a steamy bathroom corner stacks the effect. Succulents and cacti want dry air and gain nothing from a tray, so leave them out.
Does a Pebble Tray Really Raise Humidity?
Yes, but with honest limits, and this is where extension research and my own hygrometer agree. Measured right at the leaves, a well kept tray reads about 5 to 10 percent higher than the surrounding room. Move the sensor 30cm away and the difference all but vanishes. So the tray is genuinely doing something, but only in the immediate bubble around the plant.
That is exactly why placement matters. Keep the foliage low and close over the tray rather than towering a metre above it, and cluster plants so their leaves share the moist air. A single plant on a tiny saucer barely registers; three plants on a broad tray in a still corner build a real microclimate. If your whole home is bone dry, treat the tray as one layer, alongside a misting routine or a humidifier for the tough cases.
Common Mistakes That Waste Your Effort
I have seen every version of this go wrong. Avoid these four and it just works.
- Water above the pebbles. The single biggest error. It waterlogs the pot. Keep the line below the stone tops.
- A tray the same size as the pot. The evaporating surface needs to be wider than the pot to bathe the leaves. Go at least 5cm wider all round.
- Never cleaning it. Standing water grows algae and mineral crust. Scrub the pebbles and refill every 3 to 4 weeks.
- Expecting miracles. It is a 5 to 10 percent nudge, not a rainforest. For plants needing 60 percent plus in a 25 percent room, pair it with a machine.
If you like this kind of low-tech build, the same logic powers a self watering spike and a closed bottle terrarium.
Frequently Asked Questions
Q: How often do I need to refill the tray?
A: Every 3 to 5 days in normal conditions, and every 1 to 2 days if it sits over a radiator or in strong summer sun. Just top up whenever the water drops close to the tray floor. Set a reminder for the first couple of weeks until you learn your room's evaporation rate.
Q: Won't standing water attract fungus gnats or mosquitoes?
A: Not if the water stays below the pebbles and you refresh it weekly. Gnats and mosquitoes breed in still water left for many days, so a tray you top up and clean regularly stays clear. A splash of hydrogen peroxide every few weeks also keeps larvae from establishing.
Q: Can I use any pebbles, or do they need to be special?
A: Almost any inert stone works: aquarium gravel, river pebbles, or clay pebbles (LECA). Avoid limestone or marble chips if your water is already hard, since they add minerals. Rinse whatever you use so dust does not cloud the water.
Q: Should the pot's drainage hole touch the water?
A: No. The whole point is to keep the roots out of standing water. Make sure the pot rests on dry pebble tops with the drainage hole above the waterline, so the soil is not wicking moisture up from the tray.
A pebble humidity tray is the highest return, lowest effort project in indoor plant care. Ten minutes, a few dollars of gravel, and a saucer buy you a steady moist pocket that keeps fern fronds and calathea edges from crisping through a dry winter. Keep the water below the pebbles, refresh it weekly, and cluster your thirsty plants over it. If you are not sure how dry your corner really is, check the conditions there with our free light calculator first.
Sources & further reading
GreenNest authors research and write every guide independently. The external links below are reputable references we recommend for deeper reading — they are not the sources we copied from.
- Michigan State University Extension — Michigan State University
- NC State Extension Plant Toolbox — NC State Extension
- University of Minnesota Extension — U Minnesota Extension
Recommended Tools for DIY Plant Projects Care
Free, no-signup helpers matched to this guide.
Free Ebooks to Explore
Downloadable handbooks — no email required.
Free Ebook
The AGreenNest Succulent Care Handbook
The complete, beginner-to-confident guide to growing fat, happy succulents — 10 chapters and a 20-plant directory.
Share Your Plant Story
Grown something tricky, or found a trick that finally worked? Tell us in the comments, or see what other readers are sharing on our Community page. The best reader tips get folded back into our guides.
Join the Conversation
Have a tip or a question about Make a Pebble Humidity Tray in 10 Minutes? Share it below — comments are saved on our server.