 AGreenNest
DIY Plant Projects
Build a Pegboard Plant Wall That Holds 15 kg
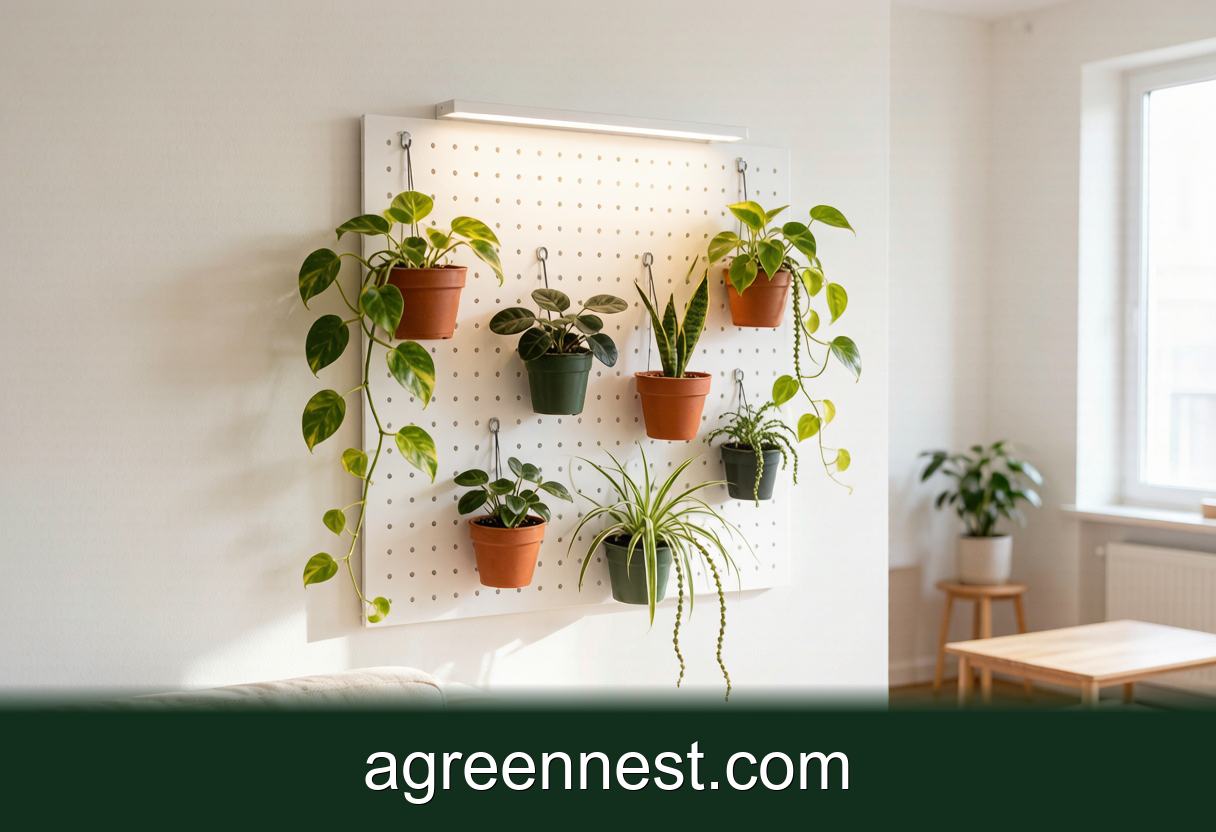
A pegboard plant wall is a perforated board mounted on 19 mm spacers so hooks can grip from behind. A 120 x 60 cm sheet of 6 mm hardboard with 25 mm hole spacing carries about 15 kg of pots on standard steel hooks, and every plant can move to a new hole in ten seconds.
The first plant wall I built was a grid of fixed wooden shelves. It looked sharp for one season, then the Ficus pumila outgrew its spot, the bottom row turned out to sit in a light shadow, and rearranging anything meant a drill, four screws, and fresh holes in a rental wall.
Version two was a pegboard. Same wall, same plants, and now a rearrange takes ten seconds per pot: lift the hook, move it three holes left, done. Two years in, that board carries eleven pots and the layout changes monthly. Here is the exact build.
What Board and Hooks Do You Actually Need?
Pegboard comes in two materials and two hole standards, and the wrong combination fails under wet pots.
- Material: 6 mm tempered hardboard or 9 mm plywood pegboard. Skip the 3 mm sheets sold for tool organisation; they sag within weeks once you pass 5 kg.
- Hole standard: 6 mm holes at 25 mm spacing is the common metric grid, and nearly all plant-hanging hooks fit it. The older 4.8 mm grid rejects most of them, so check the packet.
- Hooks: standard 6 mm steel J-hooks hold 2 to 3 kg each in hardboard. For anything heavier, use double-prong locking hooks, rated to 5 kg across two holes.
A freshly watered 12 cm plastic pot with a young Epipremnum aureum weighs 800 g to 1 kg; a 15 cm terracotta pot lands closer to 2.5 kg wet. Budget for wet weight and cap the whole 120 x 60 cm board at 15 kg.
The Spacer Detail Everyone Skips
Hooks grip a pegboard from behind, so the board needs a gap between itself and the wall. That gap is the whole mounting job.
Cut four 19 mm-thick timber strips: two at 120 cm for the top and bottom edges, two shorter verticals for the sides. Screw the strips to the wall first (into studs where you can find them, or with 8 mm wall plugs rated 20 kg each in masonry), then screw the board to the strips with 25 mm screws every 30 cm along the frame. The result is a rigid box edge, and the middle of the board cannot flex backward when you push a hook in.
Two numbers matter:
- 19 mm gap minimum. Hooks need 12 to 15 mm of clearance to rotate into place.
- Drip zone. Leave the bottom strip 5 cm above the lowest holes so a drip tray tucks underneath.
Renting? The board works freestanding too: bolt it to two 140 cm uprights with feet and lean it at 10 degrees, so nothing touches the paint. More no-drill tricks are in the rental-friendly styling guide.
Which Plants Earn a Spot on the Board?
Vertical displays punish heavy plants and thirsty plants. The winners are light, compact, and tolerant of drying slightly between waterings.
- Epipremnum aureum in 12 cm pots, trailed sideways; it covers the hardware within a season. Care notes are in the golden pothos guide.
- Peperomia obtusifolia and Peperomia caperata: dense, slow, happy in a 10 cm pot for two years.
- Chlorophytum comosum pups in 8 cm pots. Cheap to replace, quick to fill gaps.
- Rhipsalis baccifera for texture up top, where warm air dries pots fastest.
Skip ferns unless you enjoy daily misting, and skip any pot above 15 cm.
Why Does the Top Row Always Dry Out First?
Physics, twice over. Warm air stratifies, so the top of a 180 cm wall often runs 2 to 3 °C warmer than knee height, and upper pots usually sit closer to the light source. On my board the top-row pots need water every 4 to 5 days in summer while the bottom row coasts to day 8 or 9.
Two fixes. Put the most drought-tolerant plants (the Rhipsalis, the Peperomia) on the top third, and check moisture per pot rather than watering the whole wall on one schedule; a moisture meter used correctly reads a 10 cm pot in five seconds.
Watering itself happens at the sink. Every pot on my board is a nursery plastic pot dropped inside a cachepot on the hook: lift the inner pot out, soak it, drain ten minutes, drop it back. No drips on the skirting board, no saucers glued to the display. A takes the schedule question out of it entirely.
Getting Light to a Wall That Faces the Wrong Way
Most walls with room for a plant board are exactly the walls light forgot. Measure before you mount anything with our home lux test. Below about 800 lux at board height, even pothos thins out and stretches, a failure mode I break down in the etiolation guide.
The clean fix is a full-spectrum LED bar 40 to 60 cm off the board face, angled slightly down, on a 10 to 12 hour timer; distance rules are in how far to hang grow lights. A 20 W bar covers the board to roughly 1500 lux, which keeps every plant above compact.
Build Order, Start to Finish
- Locate studs or drill for wall plugs; mark a level line 90 cm above the floor for the bottom strip.
- Screw the four 19 mm spacer strips to the wall; check the frame diagonals match within 3 mm.
- Screw the pegboard to the frame, 25 mm screws every 30 cm.
- Mount the light bar and set the timer before hanging a single plant, so you can see shadows.
- Hang the heaviest pot at centre-bottom, then build outward and upward, light plants on top.
- Live with the layout for two weeks, then rearrange. That is the point of the board.
Total cost for my build: board $14, timber $6, hooks and screws $12, light bar $35. Around $67.
Frequently Asked Questions
Q: Can pegboard handle the humidity of daily plant watering?
A: Tempered hardboard shrugs off ambient humidity and stray splashes, but standing water swells it along the holes. Seal both faces with two coats of water-based polyurethane before mounting and never water pots in place. Sealed boards on my wall show no swelling after two years.
Q: How many holes apart should pots hang so leaves don't overlap?
A: Work from the mature width, not the pot. A 12 cm pot of Peperomia stays inside a 25 cm circle, so 10 holes (25 cm) between hook centres works. Trailing pothos needs 40 cm plus of clear board below the pot, or its vines curtain the plants underneath.
Q: Will double-prong hooks fall out when I lift a pot off?
A: Standard J-hooks can flip out if you knock a pot upward; locking double-prong hooks clip through two holes and stay put. Use locking hooks for every pot above 1.5 kg and for anything at head height over a walkway.
Q: What do I put behind the pegboard on a masonry wall with damp issues?
A: Slide a strip of DPC plastic behind each timber spacer so the wood never touches damp brick, and keep the board's back face sealed. If the wall shows active efflorescence, fix the damp first; no plant display survives a wet wall.
Q: Can I start a pegboard wall with cuttings instead of bought plants?
A: Yes, and it is the cheap route: root pothos and spider plant cuttings in water for four to six weeks, pot into 8 cm pots, and let them size up on the bottom row where light is gentlest. A propagation station keeps replacements in the pipeline.
A pegboard plant wall is furniture that admits your plants will change, which is what makes it work long-term where fixed shelves quietly fail. Spend the extra on locking hooks and a light bar, seal the board once, and the rest is rearranging for fun. Before you buy plants for it, run your wall's numbers through our free light calculator to see what the spot can honestly support.
Sources & further reading
GreenNest authors research and write every guide independently. The external links below are reputable references we recommend for deeper reading — they are not the sources we copied from.
- Michigan State University — College of Agriculture & Natural Resources — Michigan State University
- University of Minnesota Extension — U Minnesota Extension
- NC State Extension Plant Toolbox — NC State Extension
Recommended Tools for DIY Plant Projects Care
Free, no-signup helpers matched to this guide.
Free Ebooks to Explore
Downloadable handbooks — no email required.
Free Ebook
The AGreenNest Succulent Care Handbook
The complete, beginner-to-confident guide to growing fat, happy succulents — 10 chapters and a 20-plant directory.
Free Ebook
Haworthia & Haworthiopsis Care Handbook
A focused guide to the striped, forgiving Haworthia clan.
Share Your Plant Story
Grown something tricky, or found a trick that finally worked? Tell us in the comments, or see what other readers are sharing on our Community page. The best reader tips get folded back into our guides.
Join the Conversation
Have a tip or a question about Build a Pegboard Plant Wall That Holds 15 kg? Share it below — comments are saved on our server.